How to install AzureHound
A powerful graph tool for permissions in Azure

AzureHound Tutorial: Using Service Accounts with Least Privilege
Service accounts (service principals) are the new keys to the kingdom. However, granting only the minimal necessary permissions (i.e., least privilege) isn’t as straightforward as it sounds. Visualizing the potential attack paths using tools like BloodHound can be a very powerful tool in your security assessment to “get it right”.
Prerequisites
Go: Make sure you have Go installed. Verify by running:
go version
If not installed, download it from golang.org.
Linux/Kali Linux: Ensure you have Kali Linux installed if you plan to run Neo4J and BloodHound later.
Part 1: Setting Up AzureHound
Step 1: Clone and Build AzureHound
Clone the Repository:
git clone https://github.com/BloodHoundAD/AzureHound.git
cd AzureHound
Build the Project:
go build .
This compiles the
azurehoundbinary.
Part 2: Creating a Service Account (Enterprise Application)
Security Note: Do not use personal credentials. Instead, create an App Registrations with the minimal permissions required.
Step 2: Create an App Registration in Entra ID
Log in to the Azure Portal and navigate to Entra ID → App Registrations.
Click New registration and provide a name (e.g.,
AzureHoundService).Select Accounts in this organizational directory only (Single tenant).
Click Register.
Step 3: Assign Least Privilege API Permissions
In your new app registration, navigate to API Permissions and click Add a permission.
Choose Microsoft Graph → Application permissions.
Add Directory.Read.All (or Global Reader if broader read access is needed).
Note: You might need Privileged Role Administrator rights to complete this step.
Click Grant admin consent to confirm the permissions.
Step 4: Generate a Client Secret
Go to Certificates & Secrets in your app registration.
Click New client secret and create a short-lived secret.
Store the following securely:
Client ID (Application ID)
Client Secret
Tenant ID (found in your Entra ID details, e.g.,
TenantID.onmicrosoft.com)
Part 3: Running AzureHound with Your Service Account
Replace the placeholder values in the commands below:
YOUR_CLIENT_ID→ Application (Client) IDYOUR_CLIENT_SECRET→ The client secret from Step 4YOUR_TENANT_ID→ Entra ID Tenant ID (e.g.,TenantID.onmicrosoft.com)
Step 5: Collect Data with AzureHound
Run AzureHound to list the data:
./azurehound -a "YOUR_CLIENT_ID" -s "YOUR_CLIENT_SECRET" --tenant "YOUR_TENANT_ID" list
Output the data to a JSON file:
./azurehound -a "YOUR_CLIENT_ID" -s "YOUR_CLIENT_SECRET" --tenant "YOUR_TENANT_ID" list -o output.jsonRun AzureHound with an access token
./azurehound -j "YOUR_ACCESS_TOKEN" list -t "tenantID" -o output.jsonThis will generate the output.json file that will be imported later.
Part 4: Visualizing the Data with BloodHound on Kali Linux
Step 6: Install and Run Neo4J and BloodHound
Install BloodHound (if not already installed):
See this for bloodhound installation - https://www.kali.org/tools/bloodhound/
sudo apt update && sudo apt install -y bloodhoundRun Neo4J:
If Neo4J is not already running, start it by:
sudo neo4j consoleOpen BloodHound:
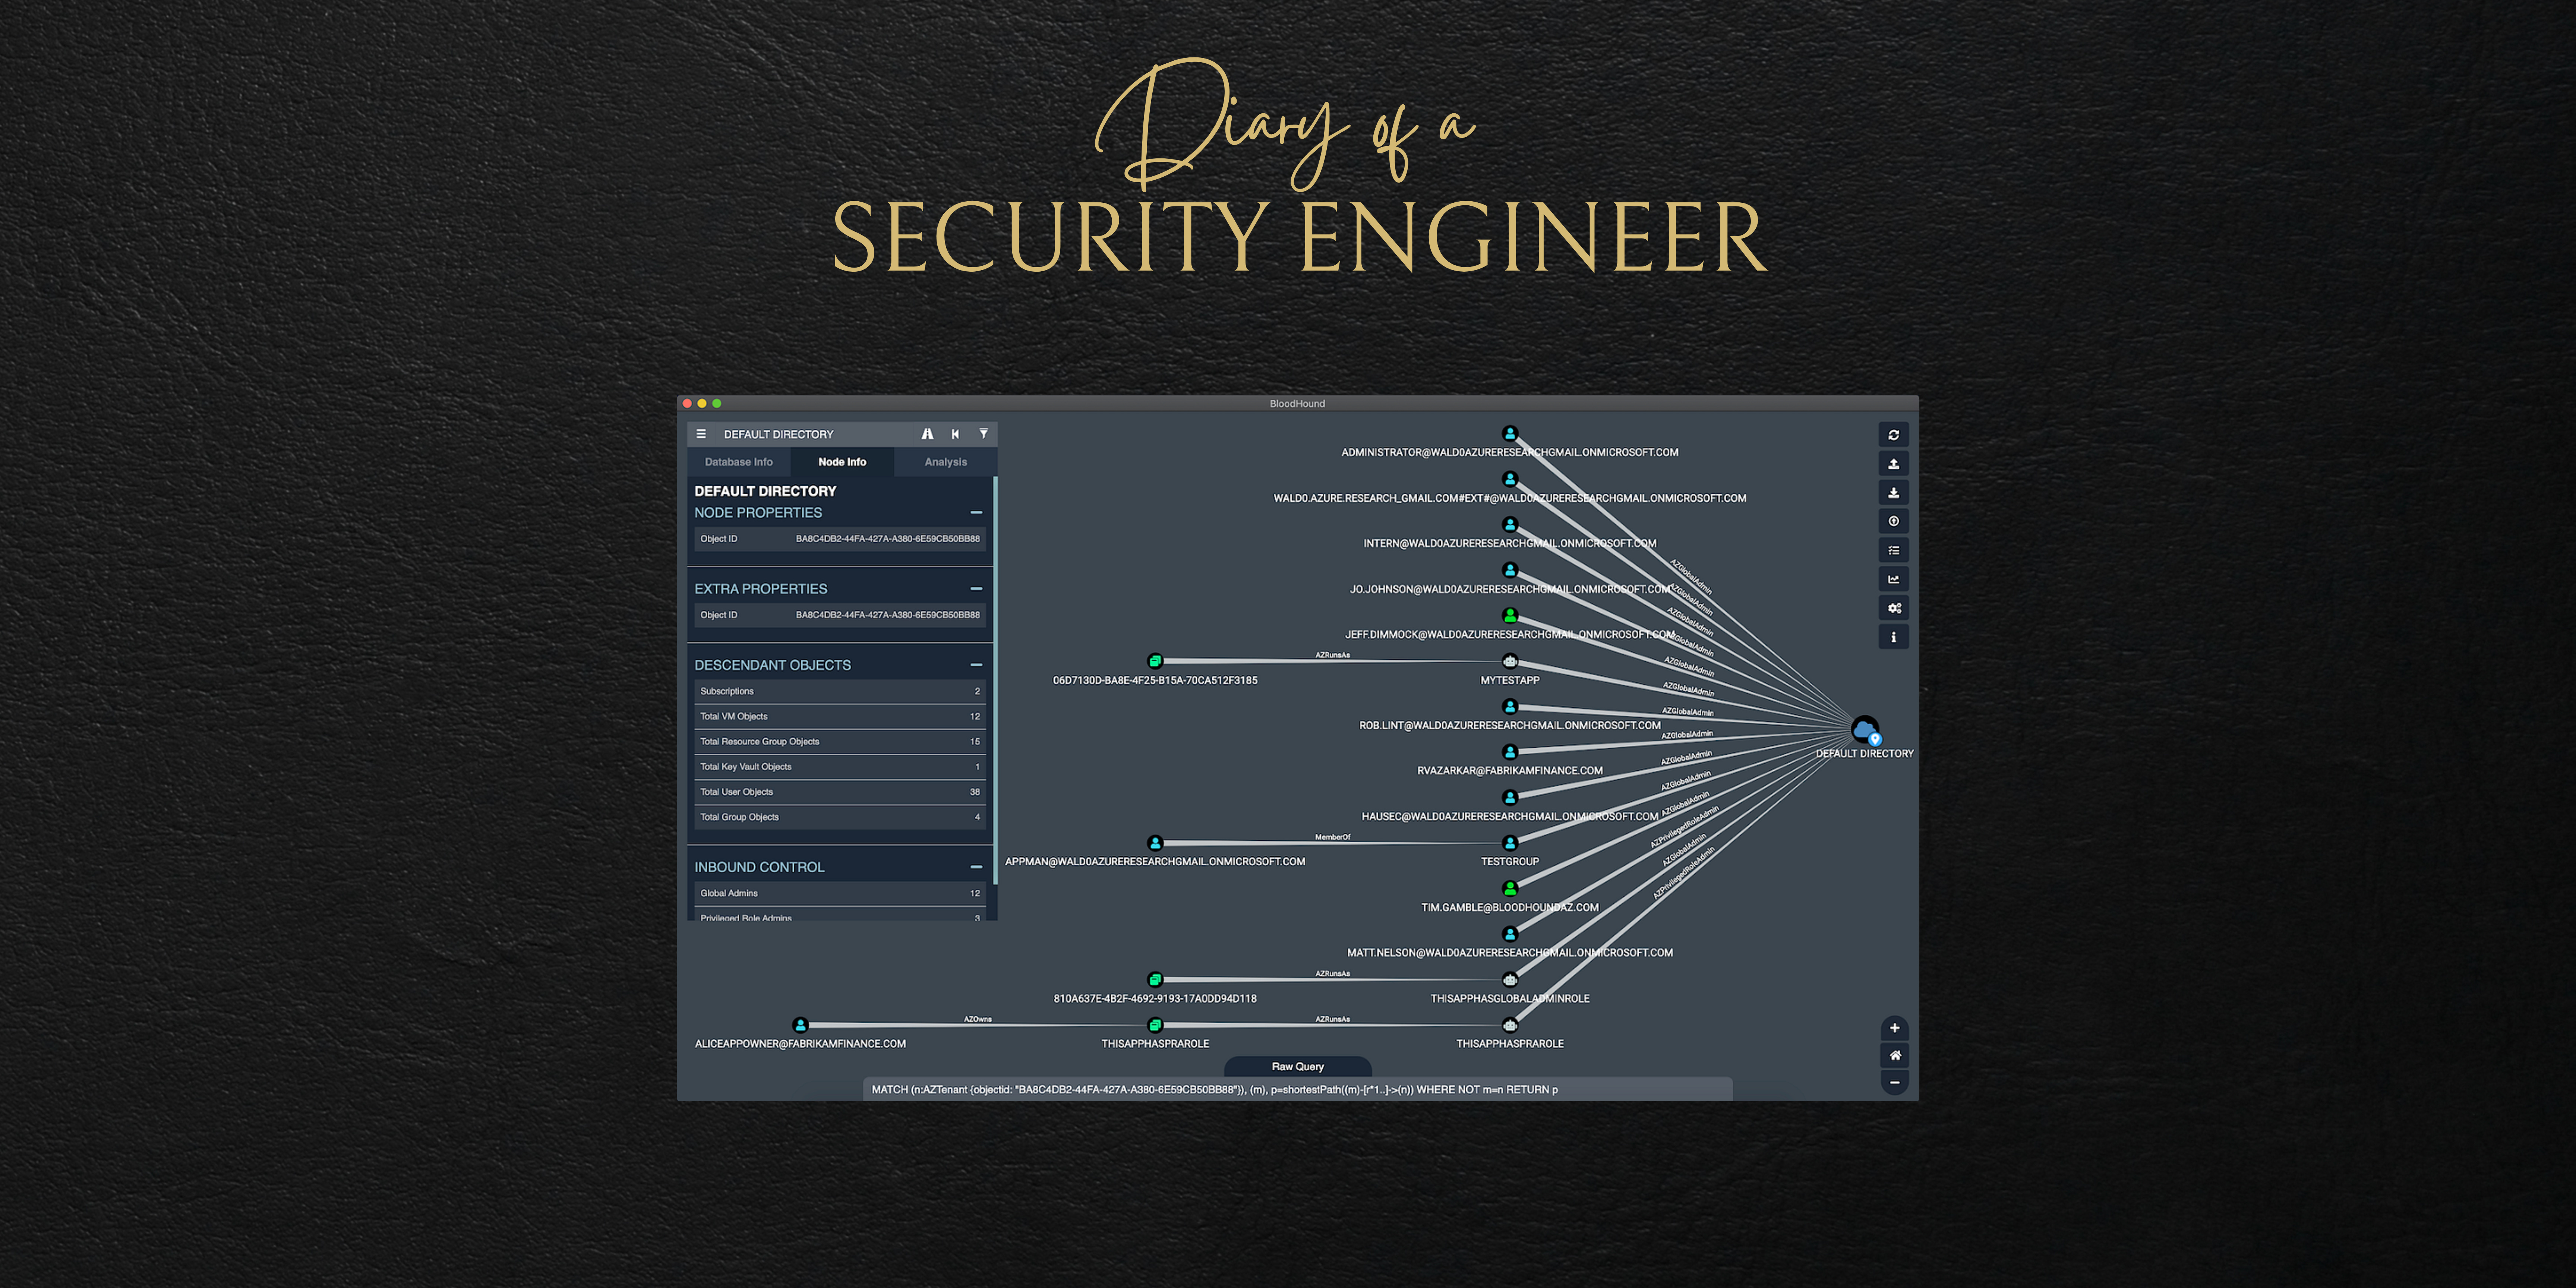
Launch BloodHound and upload theoutput.jsonfile to visualize your data.
Optional Step 7: Download Custom Queries for AzureHound
Here are some awesome custom BloodHound queries for Azure,
curl -o ~/.config/bloodhound/customqueries.json "https://raw.githubusercontent.com/emiliensocchi/azure-hunting/main/Tools/azurehound/customqueries.json"See under Cypher → Saved Quries
Resources
https://github.com/SpecterOps/AzureHound
https://bloodhound.readthedocs.io/en/latest/data-collection/azurehound.html
https://github.com/emiliensocchi/azurehound-queries